

What this solves
Receiving mail servers and security tools look up PTR (reverse DNS). A correct PTR that matches your hostname improves deliverability and looks professional.
Requirements (important)
- Pick a hostname (e.g.
mail.example.comorvps.example.com) - Create an A record: that hostname → your VPS IP
- Wait a few minutes for DNS to propagate
- Only then set the PTR
Note: PTR is rejected unless the A record already points to that IP. This applies to the Primary IP and any Assigned IPs.
Set PTR in Client Area
- Log in to Client Area
- Open your VPS service
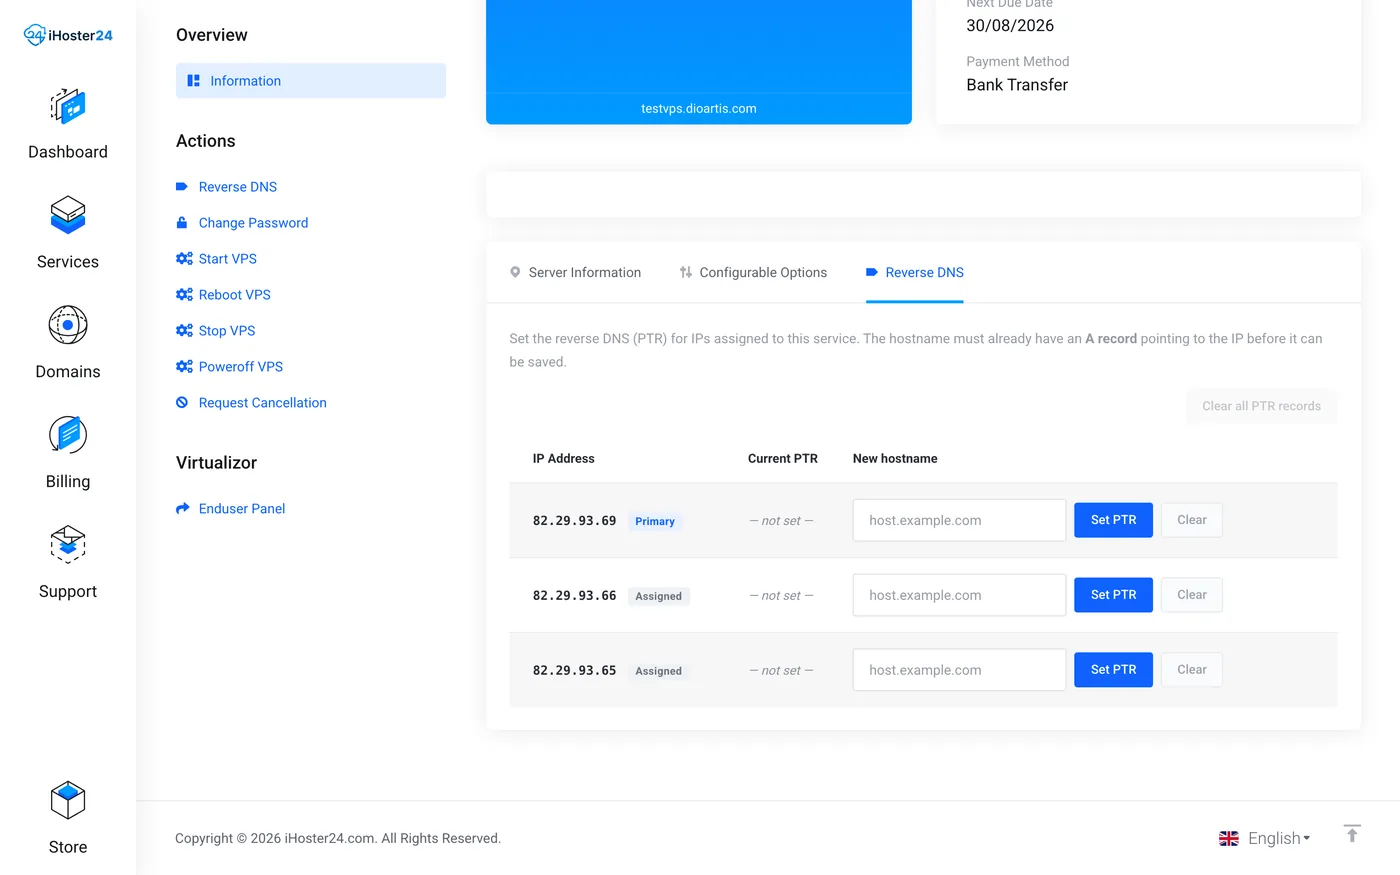
- Open the Reverse DNS tab (or Actions → Reverse DNS)
- For each IP, enter the new hostname and click Set PTR
- Re-check with
dig -x YOUR_IP +shortafter propagation
Extra IPs
Each Assigned IPv4 can have its own PTR. Repeat the A-record → Set PTR steps per IP.
Tip: Enduser Panel also has a Reverse DNS menu; the WHMCS Reverse DNS tab on the product page is the primary place for PTR on iHoster24.
When to contact support
If Set PTR fails even with a correct A record, or dig still shows the old value after several hours, open a ticket with the IP and intended hostname.
Was this helpful?
Thanks for your feedback!